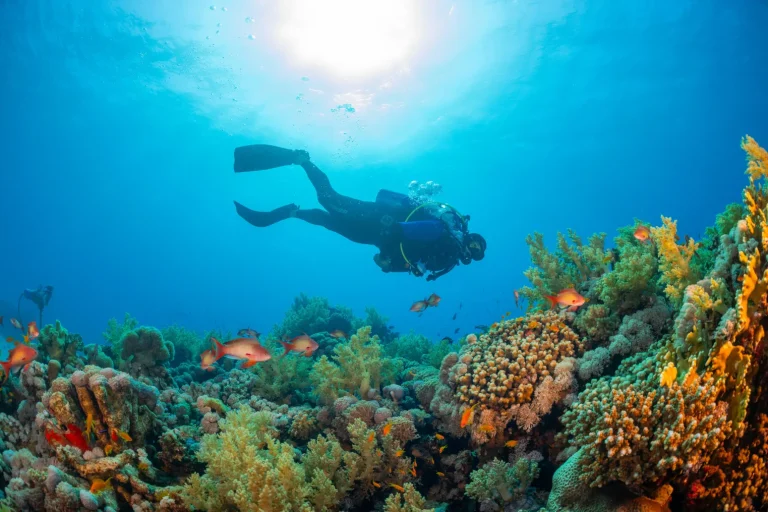
Most new underwater photos lose color within the first 15 feet, which is why Oahu’s blue water can surprise you on a screen. If you want sharp reef shots, you’ll get farther with calm sites like Hanauma Bay or Waikiki reefs, a simple compact camera, and better buoyancy than with fancy gear. Stay close, move slow, and watch your trim. The small fixes that change everything start here.
Key Takeaways
- Start at calm Oahu sites like Hanauma Bay, Coral Gardens, or Shark’s Cove, and dive early for shelter, better visibility, and easier subjects.
- Use a compact camera in a simple housing with a diffuser, and test seals, flash, macro mode, and focus before diving.
- Get close instead of zooming: 6–12 inches for macro, 1–2 feet for fish, and 1–3 feet for colorful reef scenes.
- Use forced internal flash for subjects within 3–4 feet, or add one small strobe angled slightly above the lens to reduce backscatter.
- Prioritize neutral buoyancy, horizontal trim, and slow movement so you can hover steadily, avoid reef contact, and frame shots cleanly.
Choose Easy Oahu Dives for Photos
Often, the best underwater photos on Oahu start at the easiest sites. Hanauma Bay gives you calm shallow reef and clear water so you can frame reef fish without fighting surge. Stay around thirty feet or less and colors hold. On the west side, Makaha and Kaena Point offer gentler currents and bigger pelagic subjects when visibility opens to sixty feet or more. For buoyancy practice and close subject work, try Coral Gardens or Sea Life Park, where nudibranchs, gobies, and blennies hide in the reef. Guided dives at Waikiki reefs or Shark’s Cove shine in calm summer water. At Waikiki beginner dive spots, you’ll actually see approachable marine life that’s ideal for learning both diving and underwater composition. Skip windy windward sites, go early, and tuck into sheltered bays. You’ll get closer, see more texture, and bring home stronger underwater photos every time.
Choose a Simple Underwater Camera Setup
You’ll make better photos around Oahu if you start with a compact camera in a simple housing that’s easy to carry from shore to boat and easy to manage once the bubbles start. Pick one with close-focus macro, a wide setting, and a built-in flash diffuser, then learn how it sees reef fish, lava ledges, and tiny nudibranchs before you add more gear. If you want more color later, add one small strobe instead of a full light parade, and keep your setup simple enough that it never steals the show. If you decide to use an action camera instead, dialing in the best GoPro settings for Hawaii scuba conditions can help you capture clearer color and detail underwater.
Start With Compact
A compact camera is the easiest ticket into underwater photography on Oahu, and it’s a smart one. Choose a rugged waterproof compact like the Olympus TG-7 with an affordable polycarbonate housing. You’ll keep costs down and still get crisp reef scenes and sharp macro shots. Start in automatic mode with auto white balance so your beginner setup stays simple underwater. Start in automatic mode with auto white balance. Force the internal flash for fish coral and critters within about three to four feet so colors don’t wash away. Keep the lens fully wide and switch to macro mode for nudibranchs and tiny shrimp. Before any shore dive, practice buoyancy and camera handling in a pool or calm shallows. Then test flash focus and macro range indoors in dim light too. It’s less glamorous than turtles, but your photos improve.
Add One Strobe
Now bolt on one strobe and watch your Oahu photos wake up. A compact flash like a Sea & Sea YS-D2 or Inon Z-240 brings back the warm reds that fade past 15 feet and makes reef fish and coral look alive again.
Mount it on a tray with one arm, about 6 to 12 inches above and slightly ahead of your lens. That angle cuts backscatter and lights subjects within 3 to 6 feet evenly. Positioning the strobe off to the side is one of the best backscatter fixes for clearer underwater photos. Use auto-white. Then set the strobe to manual or TTL and begin near 1/8 to 1/4 power for close shots. In AV mode, stop down to f/5.6 through f/11 and keep ISO at 100 to 400. Before your dive, test sync indoors and check for shadows at depth.
Prioritize Housing Simplicity
When the reef is busy and your fins are already brushing close to lava rock and coral heads, a simple camera setup feels like a gift. Choose a compact camera with a purpose-built polycarbonate housing, because intuitive controls and low bulk matter on Oahu reefs. Look for large, clearly labeled buttons and a built-in diffuser, or one in the box, so your flash stays easy and backscatter stays down in murky Waikiki water. Start with one strobe, or use forced internal flash within three to four feet. Skip dual strobes until your buoyancy gets calm. Check the housing depth rating, then test the seals in a bathtub or pool. To help prevent GoPro fogging underwater, make sure your housing is dry and prepared before the dive. Keep arms short, accessories few, and add a leash. Your Buyers Guide can wait underwater.
Dial In Your Camera for Oahu Dives
Before you drop onto Oahu’s reefs, take a minute to dial in your camera for the light and distance you’ll actually shoot. Set your internal flash to forced, not auto, for fish and details within about three to four feet. It brings back color that fades fast at common reef depths.
For scenic reef scenes in clear shallow water, switch flash off and use aperture-priority around f/2.8-f/5.6. That lets ambient light glow while a custom white balance keeps blues honest and coral warm. In lower visibility or later-day conditions, apply low-light video tips by stabilizing your shot and avoiding sudden camera movements that can exaggerate noise and backscatter. If you rely on strobes farther out, start near f/8 and adjust strobe power, not ISO. Before every dive, test the housing, diffuser, macro mode, and focus in dim light and again at the surface. Tiny checks save big underwater headaches.
Get Closer for Better Reef Photos
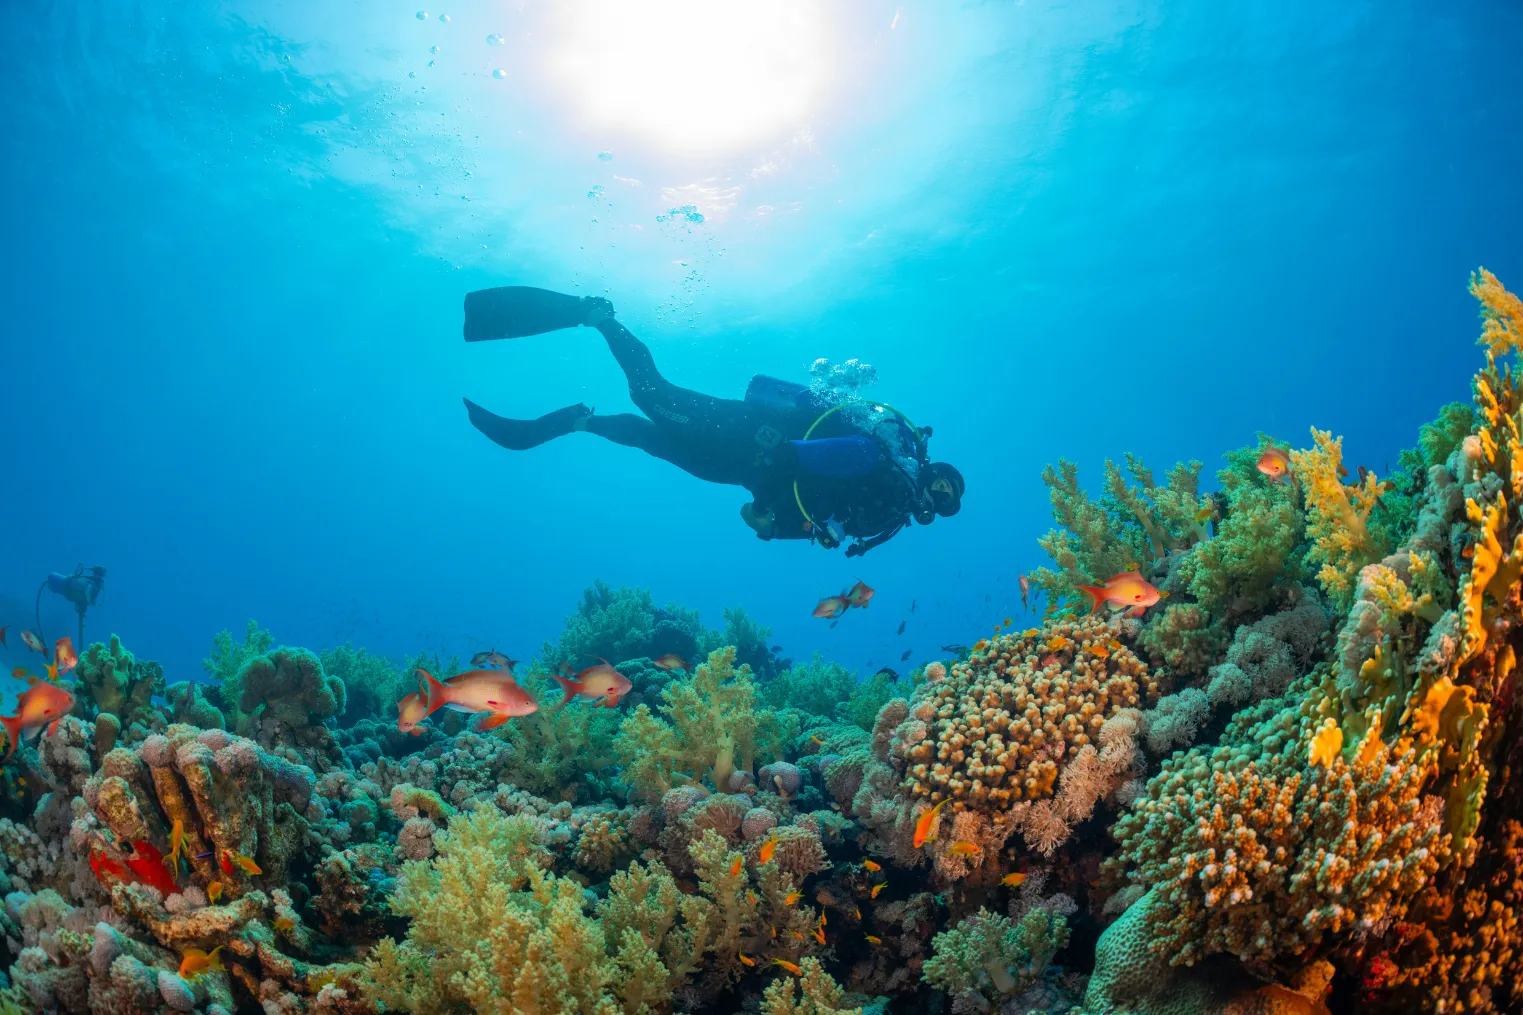
You’ll get stronger reef photos around Oahu when you cut the water between your lens and the subject and fill the frame with color and texture. Move in to about 1 to 2 feet for small fish and nudibranchs, or even 6 to 12 inches for eye-level portraits, and you’ll see sharper detail with less backscatter and less of that sneaky blue haze. Keep your lens zoomed wide so your camera can focus close, because the reef usually rewards the photographer who gets nearer, not the one who hangs back. Oahu’s seasonal visibility can change through the year, so getting close also helps you make the most of clearer days and reduce haze when conditions are less ideal.
Minimize Water Distance
Move in close and the reef suddenly looks alive instead of washed in blue. On Oahu dives, stay about 1 to 3 feet from coral scenes so color and contrast survive the water. This simple habit helps beginners enjoy Honolulu scuba diving spots while bringing back clearer reef images. For tiny nudibranchs or blennies, use your camera’s closest macro focus, keep the widest zoom, and try manual white if flash isn’t practical. When you’re within 1.5 to 3 feet, fire the internal flash or a strobe for truer reds and yellows. Approach slowly, stop finning, and hover at eye level. Your shots get cleaner, and the reef doesn’t get a rude sandstorm.
| Distance | Why it works |
|---|---|
| 1 to 3 ft | Keeps scenic reef color |
| Macro minimum | Sharp tiny subjects |
| Wide zoom | Focuses closer with better depth of field for beginners |
Fill The Frame
Framing turns a decent reef shot into one that feels vivid and alive. On Oahu, you’ll usually get your best reef photos from just a few inches to 2 or 3 feet away. That extra closeness brings back color, boosts contrast, and cuts the hazy water between you and an Angel fish or coral head.
- Use your widest focal length for close-focus wide-angle scenes.
- Move closer instead of zooming to avoid extra backscatter.
- Fill the frame with a nudibranch’s eyes and body.
- Hold eye level and steady your buoyancy before shooting.
Good buoyancy control helps you stay calm, hold position, and avoid bouncing off the reef while you compose your shot. If you’re using a flash or strobe, stay within about 2 to 3 feet so the light reaches your subject cleanly. The reef looks richer, textures pop, and your composition wastes less space. Your camera loves commitment underwater.
Use Buoyancy, Eye Level, and Slow Movements
Because the best underwater photos often start before you ever press the shutter, steady buoyancy and calm body position matter as much as camera settings. Hold neutral buoyancy within a foot or two of your depth by trimming weight and using small breaths, so you can hover without finning and spooking fish. In Honolulu, visibility and surge can change how steadily you frame a shot, so beginners should expect conditions to affect both composition and comfort underwater. Stay horizontal and use frog kicks to keep silt down over the Coral Reef. Approach subjects at eye level for a more natural view. Get close, about six to twelve inches for macro and three to six feet for reef scenes. Move slower than a casual swim and pause between adjustments. Your framing steadies, wildlife relaxes, and fewer particles drift through the shot. Control ascents and descents around thirty feet per minute.
Edit Oahu Underwater Photos for Color and Clarity
Once you’ve held steady underwater and brought the camera close, the next win happens on your screen, where Oahu’s blue water turns back into gold fish, red sponge, and green sea turtle shell.
- Use flash or a strobe within 3 to 4 feet so your image starts with better color.
- Warm white balance in Lightroom or Camera Raw, then add Vibrance for reef life, not orange faces.
- Add moderate Dehaze and a little Clarity to clear haze, but watch noise in deeper shots.
- Crop macro tight, remove backscatter, reduce noise, and sharpen with masking so the subject pops.
If you shot below 30 feet, apply luminance noise reduction and keep detail balanced. A few careful tweaks beat cranking every slider like a tourist blender. In Hawaii, a red filter can help restore warm tones in ambient-light scuba photos, especially when shooting without a strobe.
Frequently Asked Questions
Do I Need a Permit to Bring Underwater Cameras on Oahu Dive Boats?
No, you usually don’t need a permit to bring underwater cameras on Oahu dive boats. You should check each operator’s Permit Requirements, since marine park rules, commercial filming plans, or drone use can change things.
How Should I Rinse and Store My Camera After Saltwater Dives?
After a dive, you should soak your camera in a Freshwater Flush, press every button, dry it fully, and store it open with batteries removed. For example, you’ll prevent corrosion if you rinse gear immediately.
What Marine Life Photography Rules Apply in Hawaii?
You must follow Hawaii’s marine life laws: Respect wildlife, keep your distance, never touch, chase, feed, or block animals, avoid coral contact, use no flash on species, and obey monk seal, turtle, and dolphin protections.
Can I Use Underwater Photos Commercially From Oahu Dive Trips?
Yes, you can use underwater photos commercially from Oahu dive trips if you own the images, have model or property releases when needed, and follow permits, trademarks, and wildlife laws. Commercial use? Check licensing first.
How Can I Prevent Seasickness Before an Underwater Photography Dive?
Because your stomach loves mutiny, you should take approved medication early, avoid alcohol, sleep well, and eat light. Pick a calm boat spot, watch the horizon, hydrate, and ask your captain. Motion sickness? Outsmart it.
Conclusion
On Oahu, you don’t need a huge rig to make reef scenes glow. In clear Hawaiian water, you can often shoot just 1 to 3 feet from coral heads and still fill the frame with color. That close range changes everything. You’ll hear your bubbles, watch yellow tangs flick past lava rock, and notice how calm trim keeps sand from turning your photo into snow. Keep it simple, move slowly, and let the island teach your eye underwater.