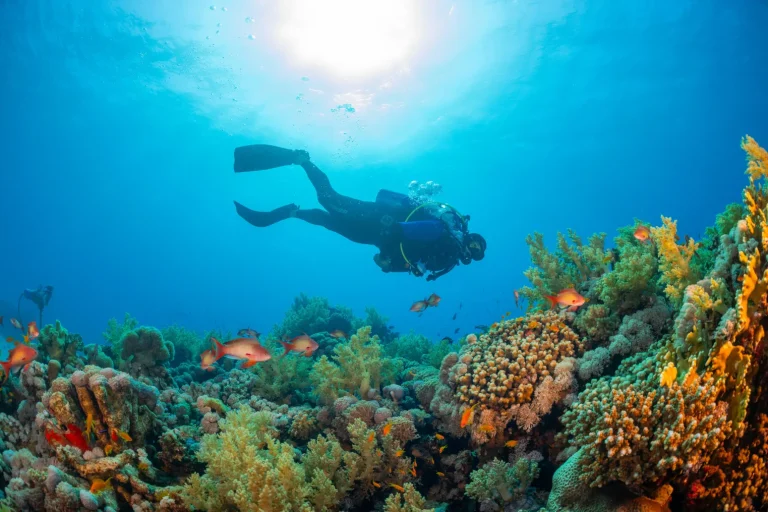
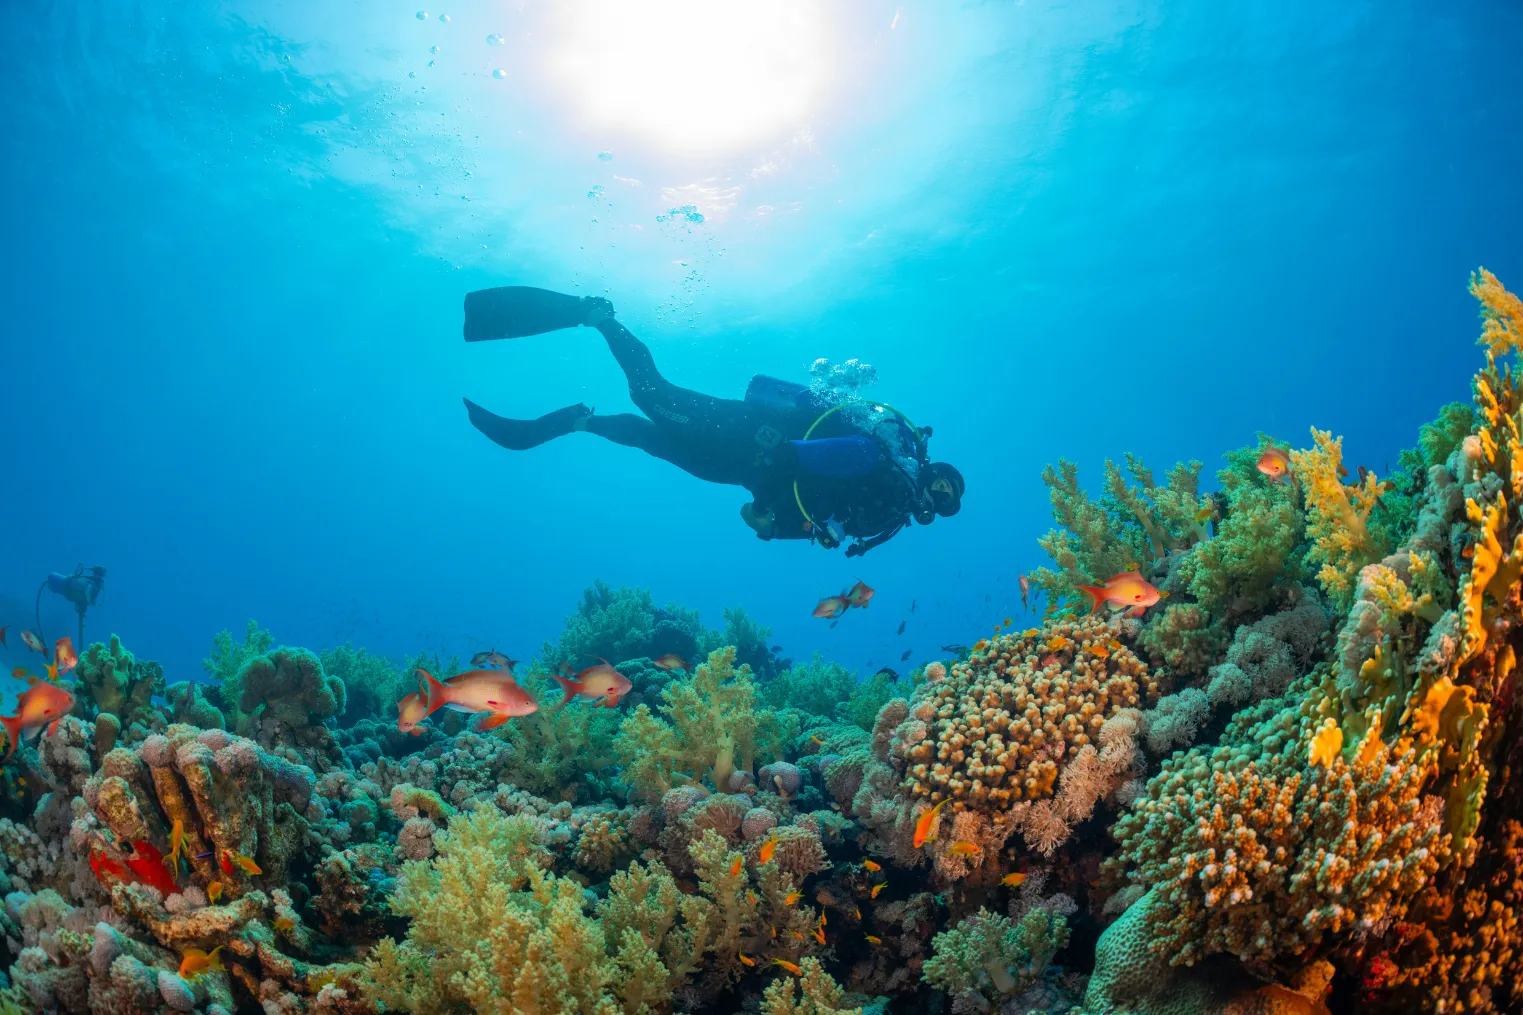
On a reef drift in Cozumel, you might spot a turtle gliding past, then realize your GoPro angle makes all the difference. A head or mask mount keeps your hands free, while a short handheld rig gives you steadier shots and better control near coral. Some setups feel easy from the first descent. Others slip, snag, or film a lot of your forehead. The right pick depends on how you dive, and that’s where it gets interesting.
Key Takeaways
- Head straps are great hands-free for beginners, especially with a chin strap to prevent slipping during entries, current, or when wearing a hood.
- Mask mounts frame whatever you’re looking at, making reef and turtle shots intuitive, but slow head movement and good trim are essential.
- Handheld trays or short poles usually produce smoother footage, improve composition, and keep hoses or BCD gear out of the frame.
- Avoid chest and wrist mounts because they often capture gear, amplify shake, and create much more editing work after the dive.
- Deploy the camera only for worthwhile subjects, clip it off between shots, and edit tightly to keep the final video steady and engaging.
Choose the Best GoPro Mount for Your Dive
Start with how you actually dive, because the best GoPro mount depends less on the camera and more on what your hands, head, and buoyancy are doing underwater. If you’re still dialing in trim, skip chest or wrist options. They often frame your BCD, gauges, or a stray remote instead of the turtle you meant to catch.
For steadier, cleaner video, choose a handheld tray. It cuts roll, keeps framing intentional, and can carry lights for reefs. For Hawaii dives, pair your mount choice with best GoPro settings that handle bright surface light and deeper blue water well. A head-mounted GoPro can work on easy dives, especially for beginners, but footage gets shaky unless you move slowly and let Hypersmooth help. Add a chin strap so the setup won’t slip on entry, drift in current, or tangle near your regulator. Then edit hard and keep the magic tight.
Use a Head Mount for Hands-Free Diving
A head mount gives you an easy hands-free setup, so you can keep both hands on the useful stuff like navigation, equalizing, or managing a tow bag while the camera rolls. You’ll want to lock it down with a chin strap or use a mask mount, because standard head straps can slip during entry, in current, or over a hood and vanish faster than a shy reef fish. Your footage won’t look perfectly smooth, but if you turn your head slowly and use good stabilization, you’ll get steadier clips and fewer jarring moments to cut later. Before the dive, take a few steps to prevent GoPro fogging underwater so your hands-free footage stays clear from descent to ascent.
Head Mount Advantages
While a tray setup can deliver smoother clips, a head-mounted GoPro gives you one big perk right away: both hands stay free. You can manage buoyancy, check gauges, and handle a tow bag without juggling a camera.
- You fin along a reef and keep your attention on navigation, not on grips and handles.
- A mask-mounted or head-mounted rig feels simple, low-task, and friendly when you’re still building dive routines.
- Newer GoPros add strong stabilization, so your footage looks better when you move slowly and keep trim neat.
- You can enjoy a low-cost setup that captures sudden turtle fly-bys, silver bait balls, and bubble trails with almost no fuss.
It also suits divers who feel early jitters, because a hands-free setup can lower task loading and help you stay calm underwater.
It isn’t magic, but it is liberating underwater for new underwater storytellers too.
Preventing Strap Slippage
Lock things down before you roll off the boat, because a standard GoPro head strap can slide fast on entry, in current, or anywhere the surface gets choppy. If you plunge in a hood, that slick neoprene makes slippage even more likely. Add a chin strap and you anchor the setup under your jaw, often around a regulator hose or snorkel too. Use a simple order: mask on, head strap on, chin strap down, then insert regulator or snorkel. That sequence keeps everything from skating sideways while waves slap and bubbles hiss. Unlike scuba goggles, a proper scuba mask seals the nose too, which helps keep your setup stable while you equalize and settle in. If you want the cleanest fix, switch to a mask mount or a GoPro-ready mask. When the surface turns rowdy or tasks stack up, unclip the camera until you need it again.
Smoother Hands-Free Footage
If you want to film the dive without turning every moment into a gear juggling act, a head mount keeps both hands free for navigation, buoyancy control, equalizing, and the little tasks that pop up underwater. A head-mounted GoPro lets you fin, check gauges, and sort clips without dropping the story. Move your head slowly. Let Hypersmooth stabilization calm the wobble. You’ll get bubbles, blue water, and surprise fish flashing past your mask. Good buoyancy control also helps you stay calm around the reef and avoid bouncing into coral while you film.
- Add a chin strap so surf entries, current, or a hood don’t shift the camera.
- Clip it off and use a tray or pole when turtles or reef details deserve steadier framing.
- If you’re new, master trim and buoyancy first.
- Expect to edit hard. Three tight minutes beat ten shaky ones.
Use a Mask Mount or Dive Mask
Because it points where you look, a mask mount or dedicated dive mask can feel like the simplest way to film a dive. A mask-mounted GoPro keeps your hands free and tracks your sightline, which feels natural when a turtle glides past or sunlight flickers across coral. Many divers love that low-task simplicity, especially when they’re new to filming underwater. Still, results vary. Some people get clean clips, while others report headaches, breakage, or footage that turns jumpy fast. Hypersmooth stabilization helps, but your trim, buoyancy, and slow head movements matter even more. If you use this setup around turtles, practice ethical filming by keeping your distance and avoiding any movement that could disturb them. Treat this setup as a curious tool, not magic. Shoot short sequences, clip the camera away when you’re done, and expect to edit out the wobblier moments later. Skip chin-strap here.
Add a Chin Strap to Stop Slippage
A head strap feels simple until surf, current, or a slick neoprene hood nudges it sideways at the worst moment. Add a chin strap and you anchor the setup under your jaw, often around the regulator hose or snorkel, so the camera stays put.
- On a giant stride entry, the head strap won’t skate across your hood.
- In current, the chin strap checks twist and bounce before they become a lost-camera story.
- Your best routine is easy: mask on, head strap tight, chin strap secured, then regulator in.
- Cheap add-ons and combo bands fit many GoPro straps and mask systems, so upgrading feels painless.
Even divers with limited swimming skills can benefit from a more secure camera setup, since reducing gear slippage helps them stay focused and calm underwater. If you dive cold water or freedive in a hood, this small strap earns its keep fast on rough days.
Choose a Handheld GoPro Mount for Stability
Grab a handheld GoPro mount and your footage usually settles down fast. A hand-held mount cuts the head-bounce you get from mask or head setups, so reefs look calmer and fish stop darting across the frame like tiny pranksters. Choose a short, rigid pole or compact tray and you’ll keep the camera clear of your BCD hood, inflator, and hoses. A dual-handle tray can feel balanced in your grip, especially with a dive light attached. It also asks more of you underwater, since one hand now works the camera. Practice buoyancy, trim, and navigation first. For long dives, clip the rig off and deploy it when turtles, wreck details, or hunting lionfish finally show up nearby for a better steadier shot every single time you dive. If you’re just starting out, a beginner scuba diving experience with convenient Waikiki hotel pickup can make it easier to focus on buoyancy before managing a camera rig.
Use a Tray and Lights for Smoother Video
Switch to a two-handle tray with lights and your GoPro footage usually gets smoother fast. A balanced tray creates a rigid platform, so your camera resists little rolls and wandering framing. Adjustable lights restore color at depth and give you visual markers, which stabilizes footage when you track a turtle or sweep past coral. For beginner underwater photos on Oahu scuba dives, this setup also makes it easier to keep subjects framed cleanly while you learn.
- You compose faster with both hands steady on the grips.
- You can clip the rig off between shots and relax.
- Practice neutral buoyancy, then move slowly and deliberately.
- Shoot short scenes, not whole dives, and editing gets easier.
It feels slightly heavier at first, yet underwater it trims nicely and keeps hoses out of frame. You’ll notice cleaner starts, calmer pans, and less random footage of sand, fins, or gauges.
Avoid Chest and Wrist Mounts Underwater
You’ll usually get cleaner results if you skip chest and wrist mounts underwater. A chest mount can fill your frame with hoses, straps, and random gear, while a wrist mount often gives you shaky clips and ties up a hand when you need it most. If you want steadier footage and less fiddling mid-swim, you’re better off with a tray, a pole, or a head mount. Thinking in terms of a shot list before the dive can also help you capture steadier, more useful beginner scuba footage.
Framing Problems Underwater
Although chest and wrist mounts seem convenient on the boat, they often turn awkward the moment you drop below the surface. Underwater, framing gets messy fast, and your best reef scene can end up half gear, half guesswork.
- With chest mounts, your BCD, hoses, or forearms can fill 30 to 50 percent of the lower frame.
- With wrist mounts, every fin kick or hand signal swings the view and tilts the horizon like a tipsy compass.
- head/mask mounts usually track what you’re actually looking at, so fish, wrecks, and buddies land nearer the center.
- If you still use chest mounts or wrist mounts, expect lots of trimming later and keep a quick clip ready for cleaner handheld framing when a turtle suddenly appears.
Clear footage also helps your buddy read hand signals more easily if they appear on camera during the dive.
Limited Camera Control
Once you’re underwater, camera control matters more than convenience, and chest and wrist mounts usually give away too much of it. With chest mounts, your framing stays fixed, so you can’t quickly angle around coral, fish, or your buddy without awkward adjustments. Some setups even block the screen or remote, and you may not notice until you’re back on the boat. Wrist mounts create a different hassle. They tie up a hand and make it harder to aim with intent.
If you want control, a hand-held tray gives you room to compose shots and react fast. Many divers clip the camera off and deploy it only when something filming appears. That saves battery, cuts editing time, and keeps your footage focused on the dive. Better control also helps you position the camera to reduce underwater backscatter and get clearer photos.
Poor Footage Stability
Often, the biggest problem with chest and wrist mounts underwater isn’t access at all. It’s stability. Your chest mount can let your BCD, inflator, or even a remote drift across half the frame. Your wrist mount turns every fin kick, gauge check, and octo adjustment into jittery footage that feels seasick fast.
- You breathe, and the camera bobs.
- You reach, and the reef lurches sideways.
- You fiddle with gear, and editing time multiplies.
- You compare clips, and a tray or pole stick looks far smoother.
Experienced divers usually ditch both once they see cleaner, calmer clips from hand-held rigs. If you still use one, move slowly, trim carefully, and clip it away between shots. Good buoyancy and calm movement also help when practicing regulator clearing underwater, which reinforces the same control that steadier camera work demands. Browse a Free photo gallery later, not your shaky footage.
Pick a GoPro Mount for Your Skill Level
| Skill level | Best mount | Why it works |
|---|---|---|
| New diver | Head strap | Simple and hands-free |
| New diver | Mask mount | Easy setup, less fiddling |
| Experienced | Handheld tray | Much steadier video |
| Mixed use | Clip-off mount | Deploy only when needed |
If you’re just starting out, pair a simple mount with simple defaults so you can focus on buoyancy and composition instead of constant camera adjustments. Add a chin strap so your mount doesn’t slip during entries or current. If you use a head or mask mount, move slowly and let stabilization help. Your footage will thank you underwater later.
Edit GoPro Footage Into Short Highlights
A good mount gives you cleaner clips, but the real magic happens when you cut that raw footage into a short highlight reel people will actually want to watch.
- Aim for three minutes per dive. You keep attention and trim out the long fin kicks between reef scenes.
- Cut shaky mask footage fast. Save only calm head turns, then add stabilization for the few wobbly gems worth keeping.
- Show only the moments that matter. A turtle glance, a blenny yawn, bright coral textures, or a quick camera move from chest mount to hand shot.
- Review your own technique too. Snip clips with bad trim or flailing arms, learn from them, then share your dive photos and polished video with friends after the boat ride home.
When you film evening or deeper reef scenes around Hawaii, apply low-light video techniques so your best clips stay clear enough to make the final cut.
Frequently Asked Questions
How Do I Prevent Fogging Inside the Gopro Housing Underwater?
Prevent fogging by cooling your GoPro before sealing it, using a breathing technique and microfiber wipe inside, adding silica gel or anti fog inserts, and keeping O-rings clean, greased, and seated so moisture can’t condense.
Which Color Filter Works Best for Different Scuba Diving Depths?
By 30 feet, you’ve already lost much red light: use a red filter from 10–70 feet, a magenta filter in green water, and depth specific filters deeper; below 130 feet, skip filters and use lights.
How Long Does a Gopro Battery Last on a Typical Dive?
Expect about 45–90 minutes on a typical dive; your battery runtime depends on settings, temperature, and screen use. You’ll boost dive endurance with smart power management: lower resolution, disable Wi‑Fi, and record only when needed.
What Camera Settings Are Best for Low-Light Reef or Wreck Dives?
Like a cat in moonlight, you’ll want Wide/SuperView, 2.7K or 4K/30fps, Protune Flat, Auto or 5000–6500K white balance, Hypersmooth on, Low Shutter near 1/30, High ISO capped 800–1600, and the widest Wide Aperture available setting.
How Should I Rinse and Maintain Gopro Mounts After Saltwater Dives?
Rinse your GoPro mounts immediately in fresh water, then give them a freshwater soak, work buckles underwater, dry metal threads, add sparse silicone lubrication, inspect O-rings and pads, and keep everything loose in dry storage.
Conclusion
Pick the mount that lets you enjoy the dive, not wrestle your camera like a tiny plastic octopus. If you want easy footage, the hands-free option often creates the most editing later. That’s the joke underwater. A simple handheld rig or tray usually gives you steadier coral scenes, cleaner light, and less fuss on the boat. Keep clips short. Add anti-fog inserts. Then watch your dive sound like bubbles and look bright and worth keeping.